
I have built a fair few shields in my day, but never documented its entire process, nor ever made one quite this fancy. Two birds with one stone, go!
So from start to finish:
A solid ash planked shield, with bracings, riveted nails over hand cut square washers, stitched leather edge, and a leather backstrap.
The raw material: two 36" x 6" x 2"thick boards of raw white ash.


These first need to be dressed and resawn into thirds, which ends up as roughly 9/16" in thickness, accounting for losses from the blade thickness (a measure called kerf).
This process would have actually been a degree of magnitude easier with a large and powerful bandsaw, but my trusty little jobsite tablesaw also worked to slice these boards (though it took a lot longer and with way more effort).

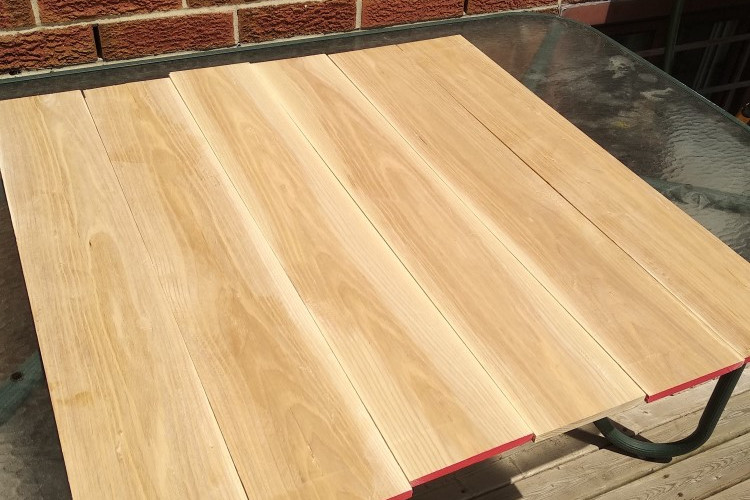


Now with nice, clean, flat planks run through the planer to a consistent thickness, the magic of ash grain can be seen across the entire width. I laid out my planks and chose their order and orientation, which side faces outward for the loveliest show of ash's flaming grain patterns. Once happy with the order and look, i lock that layout in with some marks on each board, numbering and orienting them, so that at any point of the build process, this exact placement scheme is not lost.
Did you notice the empty space between the boards in the last photo? Quite undesirable.
At this stage, the edges of each plank needs to be straightened so that it seats perfectly with the one beside it without leaving gaps. I don't have a jointer, so i used a large straight ruler and my palm router. Years of improv club are finally paying off!


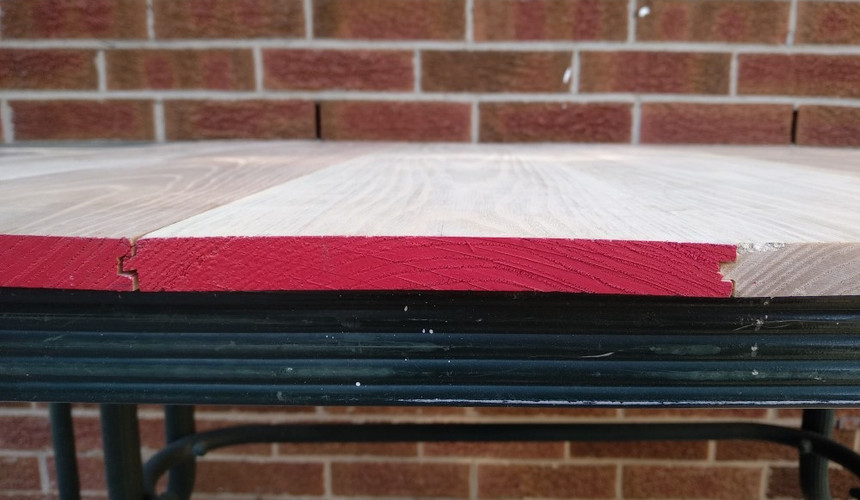
A second level of board bond boosting - giving the boards something to bite into while laid aside one another. This method of cutting a channel and recess male and female side is called Tongue & Groove Jointery, and it is going to add the benefit of keeping these boards aligned to each other during the glue up, while providing an increase in glue surface, but on top of all that also adding a mechanical hold to the planks. This small detail is one of the major strengtheners of the shield.
Finally, glue time!


Improvisation served me well here too, because i don't have long clamps or a particularly large flat surface to roll this out, i used my CNC bed and my homemade holddowns, with help of my makeshift anvil acting now as a massive paperweight. Pairs of planks were glued individually (1 to 1, three times), then one 2x2, then one 4x2 - all still on my CNC bed and using my trusty holddowns.
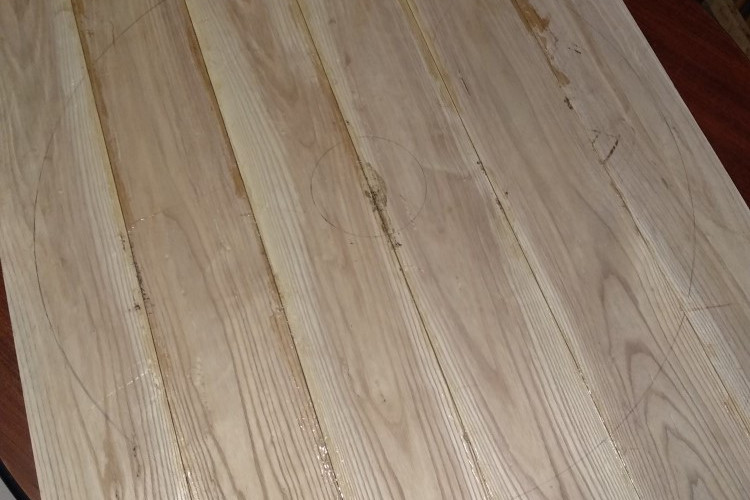
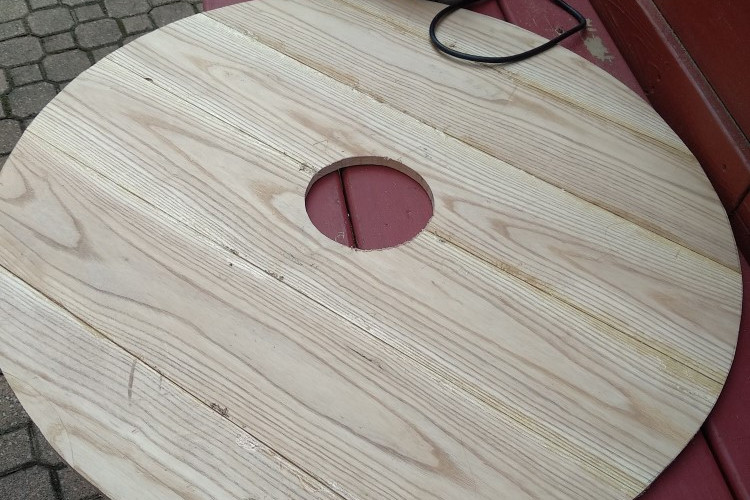
With all the planks now glued, we have a fence! To turn it into a shield, I mark my 31" diameter and draw on the inner and outer circumfrences, then slice it up on the bandsaw.

Huzzah, we now have a shield shaped object!
The glue squeeze out is our next target. Taking it outside and hitting it with both the belt and random orbital sanders, the ash really comes to life with a good cleaning. While at it i also cleaned up the rough sawn edges of the shield, smoothing them out and rounding them over just a tad.


Bellissimo. The grain patterns of these planks were really quite mesmerizing.
Now glued, shaped, and cleaned, i noticed this shield body is actually a fair bit heavier than my usual shields come out - this one being 10lbs by itself without even accounting for the handle, bracings, nails, and leather still to be added. I needed to reduce this weight, so i went to work on a technique i remember the Norse employed on their shields for the same reason: distally tapering the shield towards the edges.
The one difference is i used a power plane, with only a fraction of the time and elbow grease it would have taken those old world woodworkers.


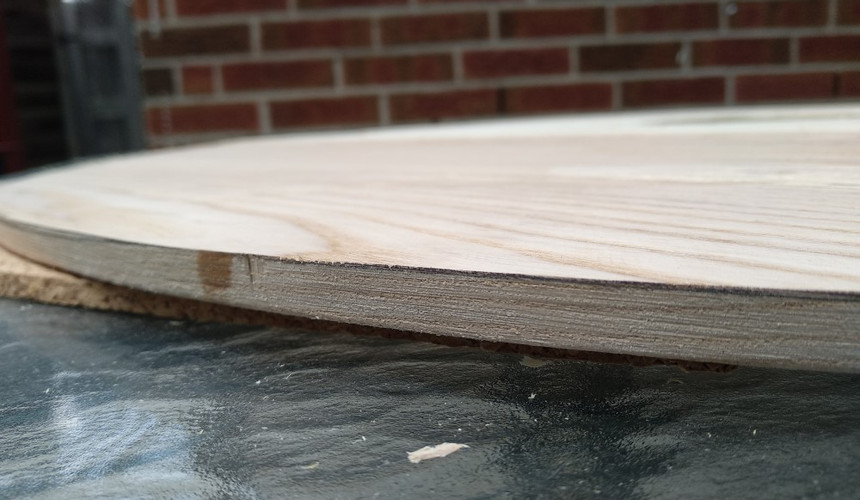


Boom, one full quarter of the weight shed with this operation!
Much more maneuverable now.
Time to face the shield!!
Used here: raw canvas and white glue, with these little laundry clips to keep the canvas under tension as the glue dries

Let that dry, then trim the excess.
[I can't tell you how satisfying cutting the canvas off the edges is ;)]
We're getting real close now!
Drilling holes is next. and there are many holes to make.
Starting with the simplest but also the most tedious, while still unobstructed by the handle or bracings, i laid out my placements for the holes by the outer rim of the shield for the leather edging to be stitched. I used one of my leatherworking tools for marking an offset from an edge, followed by evenly spaced jabs of my marking divider.
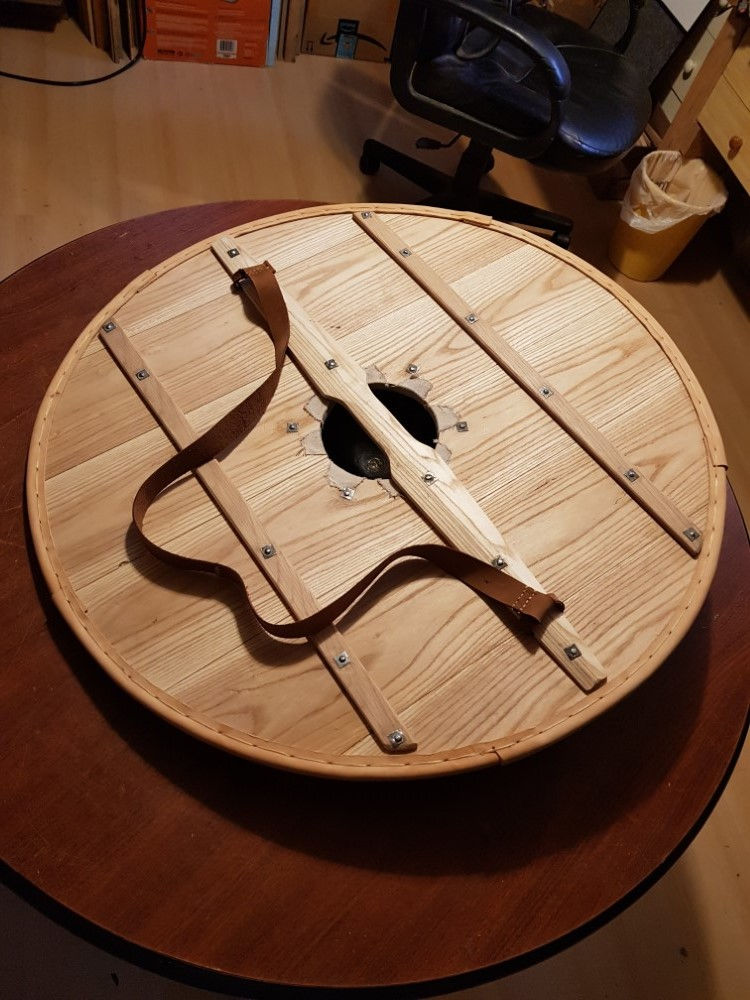
For the handle, I first pre-drilled two holes into the steel shield boss, North and South of center, then stuck it to the shield temporarily with some tape to lay everything out nice and perpendicular. I then clamped the handle to the shield's opposite face, and using my boss' pre-drilled holes, continued all the way through the layers. Lining these elements up first and foremost made everything else go smoothly. The rest of the handle followed, then afterwards the bracings.
[No footage was caught of this unforuntately, but it's quite straightforward]

Holes, check. Nails, stocked. Washers? Those need to be made.
I used some unidentified sheet steel solid enough to not deform under pressure, about 1.5mm thick, marked out a grid, drilled the centers, and got to work with the snips.
[I also torched off the shiny coating on the washers *which was done outside as the fumes of burning galvanized steel are highly poisonous* and gave them a duller but more raw-forged colour and texture]
Now finally we can assemble all the hardware and have a shield that actually shields!
Using the washers, I cut and grind down the nails so they protrude no more than 2-3mm proud, then mushroom the steel of the nail over the washer with a ball peen hammer. This technique is my preference over clinching nails, because in this way the nails become rivets and exert a very large amount of clamping pressure while it holds everything together.
Don't forget to peen the washer corners into the wood as well, so as to not catch or scratch anything brushing up against them.
Here's a look at the process of the riveting method assembly I like to use.
And the result:

Pow pow! Final detailing time!
Time to prep some leather and stitch up the edging!
Straps are cut, holes marked and punched, assembly placement is tested, an old favourite movie is loaded on the 'Flix, and thus begins the roughly 1 3/4 hour long process of binding the leather to the shield with some artificial sinew and a whole lot of hand ache.

Woop woop~
One last finishing touch - a back strap for carrying
And done!
Actually scratch that, I keep forgetting the very last final final touch. My brand!
NOW the shield is 100% complete!


I really enjoyed seeing the process of making the shield from start to finish. It's crazy how much detail goes into every step. I've been dabbling in making some wooden shields for some custom orders I got recently so I really found this helpful and am hoping to apply some of that fine tuning in my own work. Keep up the good work. Thanks for sharing!